
In this segment we will talk about the patch squares and the block grid that make up most traditional blocks.
When I say “patch squares” I mean patches of various shapes that make up a square. So it could be simply a square of fabric, or it could be a Half-Square Triangle patch (2 triangles making up the square). Or it could be a Quarter-Square Triangle patch, (4 triangles making up the square). Or, another type of patch that is the combination of other shapes.
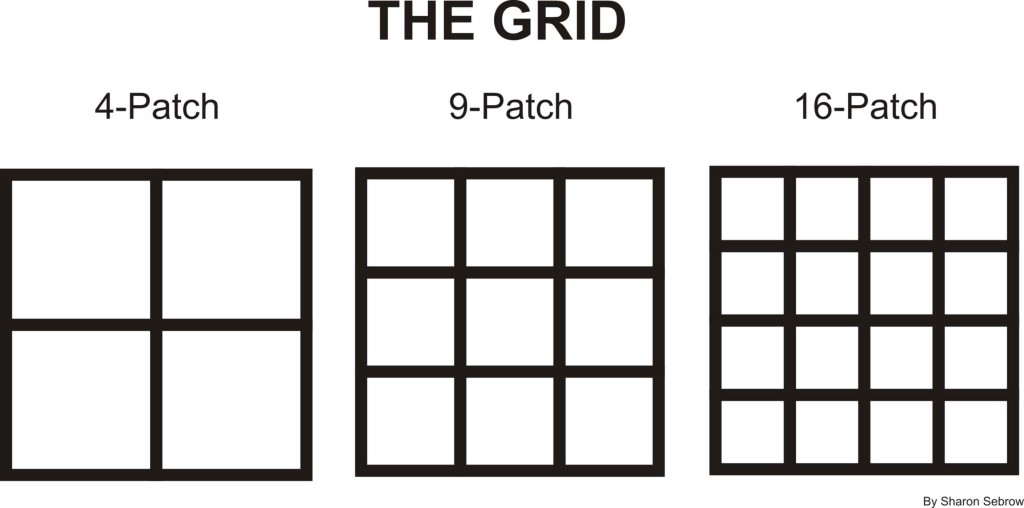
When I say “The grid” I mean the rows across by the columns down that make up a block. A 4- patch would be 4 patches in a 2×2 grid or 2 rows of 2 patches; a 9-patch block would be 9 patches in a 3 x 3 grid, 3 rows of 3 patches. and a 16-patch also known as a Double 4-patch, would be 16 patches in a 4 x 4 grid or 4 rows of 4 patches.
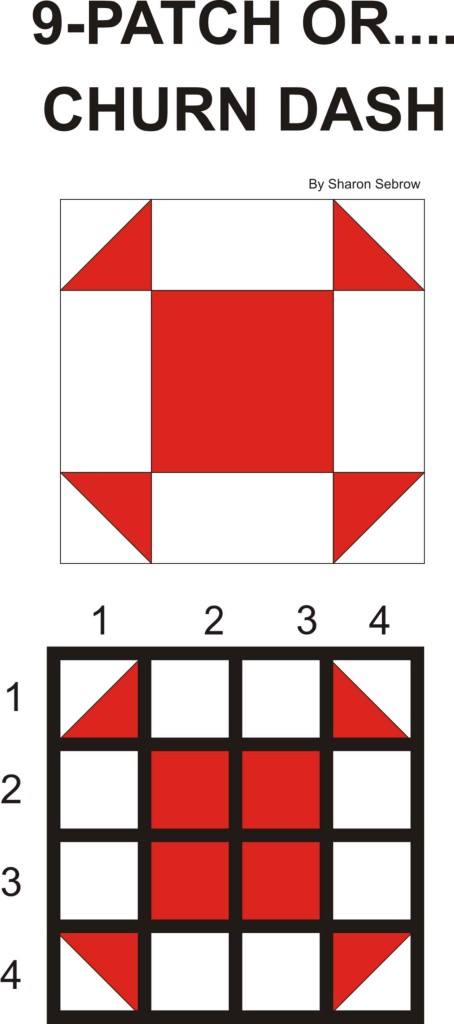
Sometimes the grid is easy to see, like in this monkey wrench block. You see there are 3 rows each with 3 squares. However, in this churn dash, although it is very close in style to the monkey wrench, has an elongated center section, where the corners are half the width as the side centers. This could be considered a 9 patch as there are 9 squares sewn together to create this block, but, you could break it down to a 16 patch grid. By breaking it down into smaller parts, you can see where design elements can be added to the block to make it visually more complex and a more impressive block.
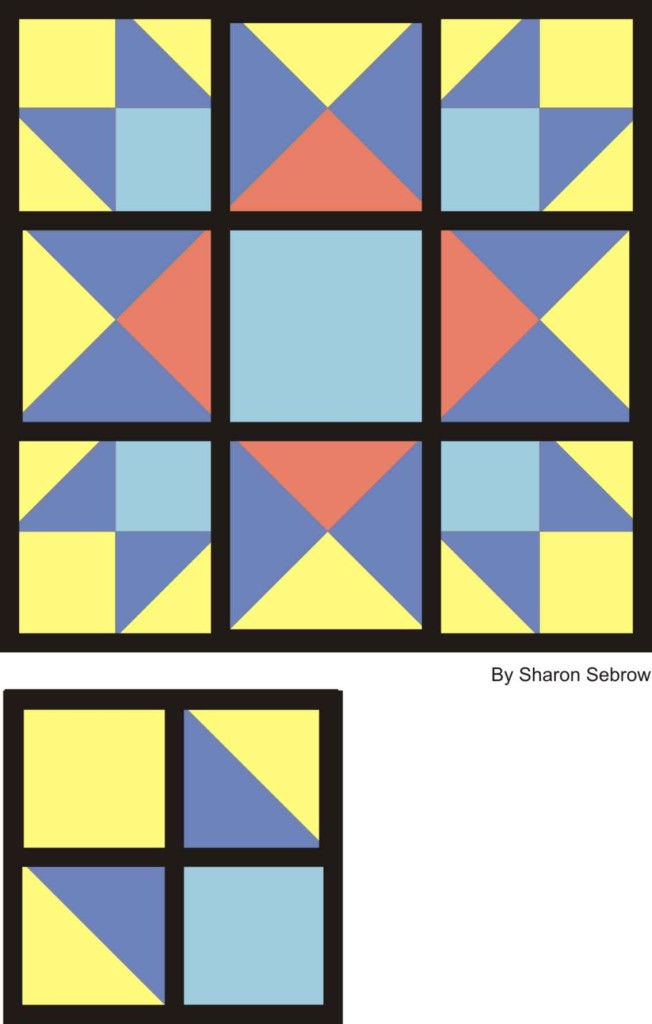
Sometimes, the blocks start out that way. As you see in this example, the block would be considered a 9-patch block, but the corner sections of the block have been further broken down to four patches.
By breaking down the block to the grid, you are simplifying it in a way that will make the size adjustments much simpler to deal with.
Another way to make dealing with the block adjustment easier is to try to use sizes that the blocks will divide into evenly.
A block with a 3 x 3 grid can easily be any size divisible by 3 : 3”, 6”, 9”, 12” etc.
A block with a 4 x 4 grid can easily be any size divisible by 4 : 4”, 8”, 12 etc. however, that does not mean that you cannot have a 9” 4-patch block. It just means you may be dealing with measurements that have fractions.
When you start reducing blocks and get sizes with 1/16th inch or even 1/8 inch, you may decide to adjust the size of the block slightly larger or smaller, just for the simplicity of the math and ultimately the cutting involved.
By breaking down the block, you are simplifying the block to its parts. You can then see the individual patches that are needed to construct the block.
By putting it into a grid, you are able to make adjusting the size much simpler to deal with.
Another way to make dealing with the block adjustment easier is to try to use sizes that the blocks will divide into evenly.
A block with a 3 x 3 grid can easily be any size divisible by 3 : 3”, 6”, 9”, 12” etc.
A block with a 4 x 4 grid can easily be any size divisible by 4 : 4”, 8”, 12 etc. however, that does not mean that you cannot have a 9” 4-patch block. It just means you may be dealing with measurements that have fractions. When you start reducing blocks and get sizes with 1/16th inch or even 1/8 inch, you may decide to adjust the size of the block slightly larger or smaller, just for the simplicity of the math and ultimately the cutting involved.
But more on that later….